KPovModeler 0.2
Written by Olivier Saraja (olivier_at_linuxgraphic.org)
English version
Step 4: Setting a material for the Blade
Of course, rendering the scene now will show us nothing but a pitch black blade for the screwdriver: we need to define a proper material. There are many way to set a material, but I'd like to introduce a method that make the material easily reusable in another scene. Of course, you could reuse one of the Chrome textures shipped with the kpovmodeler example files but I thought it would be more interesting to set all the following by ourselves.
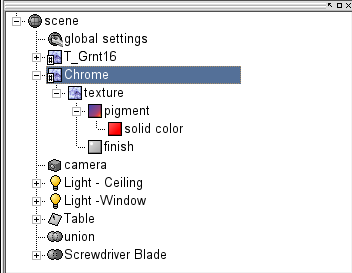
Select the Scene entry in the Object tree, then insert a Declaration as a Last Child (
Insert > Declaration
or
 Icon).
In the Object Properties View, you can rename it to Chrome. Then Insert a Texture (
Insert > Textures > Texture
or
 Icon), a Pigment (
Insert > Textures > Pigment
or
 Icon) and a Solid Color (
Insert > Textures > Solid Color
or
 Icon). Click on the Solid Color entry and modify the parameters as follow:
 solid color
red = 0.93333, y = 0.93333 , z = 0.93333
filter = 0, transmit = 0
Now select the Texture entry, Insert a Finish (
Insert > Textures > Finish
or
 Icon) and adjust the parameters as follow:

The texture has been correctly set, but you still have to assign it to the Screwdriver Blade. In order to do this, first move the Texture Declaration just after the T_Grnt16 already showing in the Object tree. By doing this, you make sure that all the objects declared 'later' in the tree can use this texture as part of its own texture declaration.

Select the Screwdriver Blade, and insert a texture (
Insert > Textures > Texture
or
 Icon) as Last Child. Click on the Select button and then choose 'Chrome' in the popup list.

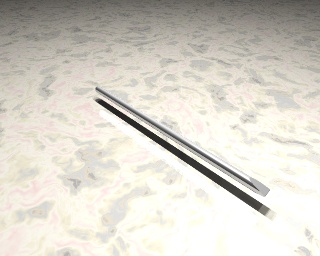
And here's the final result:

Quite easy, huh? In fact, you'll see that modeling the shaft of the screwdriver is equally easy and straightforward.