 |
MATERIAL INDICES
By Olivier Saraja |
 |
MATERIAL INDICES
By Olivier Saraja |
We are almost at the end of our study about the material indices in Blender. The only left thing to see is how material indices can be useful during the modelling of an object.
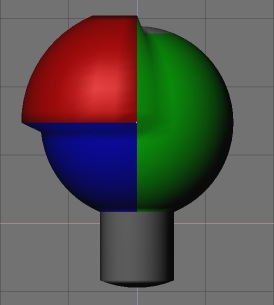
Select your sphere (right mouse button) and enter the edit mode (TAB). Call the Edit Buttons (F9-KEY). Click on the n Mat: n button until you get the material index attributed to the 'Red' material (for example). Click on the Select button. Now click on the S-KEY and move your mouse cursor in any direction. Confirm the change by pressing the ENTER-KEY when you are satisfied. Deselect all the active vertices (A-KEY). Click on the n Mat: n button until you get the material index attributed to the 'Grey' material. Click on the Select button. Toggle to the front or side view (NUM-1 or NUM-3). Deselect all the vertices belonging to the upper hemisphere of the object. Press the E-KEY and extrude the selection toward the bottom of your screen. You should get something like this.

Well, that's right ! This
object looks like nothing in particular, but the purpose of this step wasn't
to model anything, but only to see how we could use the material indices
for 'selective selection' of vertices from the same family. Now, you
can tweak all your materials exactly as you do every day, and give them
textures, transparency, etc. according to your needs !
|
|