 C
o n c e p t s
 C
o n c e p t s
C
o n c e p t s|
|
Objects edition end transformation
2 work modes are available to modify objects
:
- The Selection Mode : use ![]()
- and the Edit Mode : use ![]()
The space bar toggle from one to another
mode. It's easier than the icons !
Se the Modes rubric of the "Tools and commands" section.
The Selection Mode enables placing,
resizing, orientation of objects.
More details : How
to select and manipulate objects rubric of the "Tools and commands"
section.
The Edition Mode allows you to modify
the outline and manipulate Bezier curves.
More details : Objects
Edition rubric of the "Tools and commands" section.
Background and outline of an object
- In Sketch, an object is defined by a
background and an outline. We can assign to them a color (or none), the
transparency. There are characteristics that are specific to elements:
thickness for the outline, the type, the end, a gradation for the background.

- To assign a color, a gradation, a design
or a texture to the background of an object, you must select it, the you
can even choose one of the colors at the bottom of Sketch or use the "Filling
up" or "Filling up colors" floating toolboxes that appear with a right
click (you can select "no filling up" too).
See Filling
up section for more details on how to use this floating toolboxes
- You can modify the outline of an object
with a right click (the "Line" toolbox appear) : you can specify value
for the different options (thickness, color...).
See line
section for more details on how to use this floating toolbox.
Grouped Objets
![]() This
icon is used to group 2 or more objects (use <shift> to add elements
to your selection)
This
icon is used to group 2 or more objects (use <shift> to add elements
to your selection)
- When 2 elements (or +) are grouped, modifications
are applied to both starting objects.
- If you modify the filling color of the
background or of the outline, both will be changed.
If you want to modify them separately,
you first have to ungroup them.
Dispose objects
Each object can be placed under or above
another one.
More details can found in the Dispose
rubric of the "Menu and toolbars" section.
You can also use layers for complex drawings:
Use of layers
Layers are transparent and are use to
place objects above others.
Modifications made on a layer don't modify
the others.
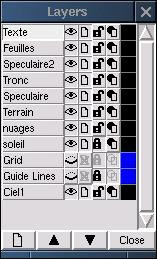
The layer toolbox enables you to modify
the position, the hiding, the write protection of a layer.
You can also control the grid, the guides
and offers a wired mode very useful for complex compositions.
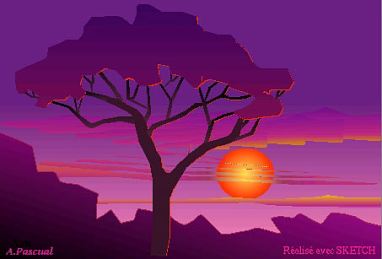
In the following example, each object is placed on a layer.


See details of the layer
toolbox in the "floating toolboxes" section.
![]() The
"Insert Image" tool
The
"Insert Image" tool
This tool opens a toolbox enabling bitmap
image importation. Supported formats are : ps, eps, jpeg (jpg), gif, tif,
bmp, pcx, ppm, pgm, pbm.
When the image has been selected and imported,
its outline appears dotted. Place the image and click "ok" to validate.
You can modify the size, the position,
...in Selection Mode like a basic object.
| P r e v i o u s p a g e | |
|
|
|