 |
Blender : Animating a fire with
Blender
By Saraja Olivier |
 |
Blender : Animating a fire with
Blender
By Saraja Olivier |
We will add rigth away a texture to our fire, and set the many parameters
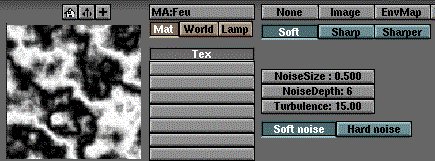
to get, at last, a realistic looking fire. please call the Texture Buttons
(F6-KEY or ![]() )
and add a new texture (ADD NEW) by clicking on the
)
and add a new texture (ADD NEW) by clicking on the ![]() button. A row of texture types then appears. Choose the
button. A row of texture types then appears. Choose the ![]() button to access the marble texture parameters. Try the following values
: NoiseSize : 0.500, NoiseDepth : 6 and Turbulence
: 15.00. Perfect !
button to access the marble texture parameters. Try the following values
: NoiseSize : 0.500, NoiseDepth : 6 and Turbulence
: 15.00. Perfect !

Please go back into the Material Buttons (F4-KEY or ![]() )
in order to tune our parameters. The new texture shows hideous pink stripes,
which is Blender's default secondary color. Our first move will be to change
the R, G and B sliders values in the area devoted to textures parameters,
on the right. Choose R: 1.000, G: 1.000 and B: 0.600
to get a lovely yellow that will enhance the orange colour of the Halo.
We are almost at a end ! We will now stretch the texture in order to have
our true fire texture ! Set SizeY: 0.300. Always in the area devoted
to the texture parameters, turn on the
)
in order to tune our parameters. The new texture shows hideous pink stripes,
which is Blender's default secondary color. Our first move will be to change
the R, G and B sliders values in the area devoted to textures parameters,
on the right. Choose R: 1.000, G: 1.000 and B: 0.600
to get a lovely yellow that will enhance the orange colour of the Halo.
We are almost at a end ! We will now stretch the texture in order to have
our true fire texture ! Set SizeY: 0.300. Always in the area devoted
to the texture parameters, turn on the ![]() button to let Blender transfer to the material the transparency settings
of the texture. Only one step left to have our great fire !
button to let Blender transfer to the material the transparency settings
of the texture. Only one step left to have our great fire !
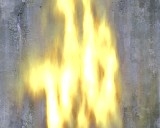
Each particle will be given a Halo and we have to define its size. Set the parameter HaloSize: 4.00 and render the first picture of your animation (F12) to check the result and move the emitter up or down accordingly, if you wish. What a lovely fire ! We should associate it a good smoke effect for the illusion to be perfect.

|
|