| |
|
|
About the
picture of the month
|
 |
Just a few words and some
tips about this picture. First of all, Blender can easily work with big
files, but to work in a good environment, you have to manage each component
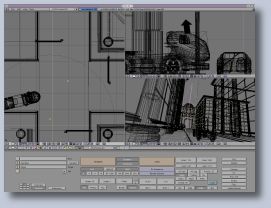
of your scene throughout different layers. The following screenshot shows
my computer on-screen workspace, so you can notice that I have used 8 different
layers for the whole scene.

Without these, you cannot
work unless if you have a monster hardware acceleration (maybe a Nvidia
Quadra). I'm using a dual pentium III 550 with 128 Mb of RAM and a TNT2
card, with a Suse linux 6.3 OS. Please note that I use Xfree 4 with the
latest drivers from Nividia, otherwise it isn't possible to work at this
resolution (1600*1200). After these hardware explanations, the major part
of the work concerns the making of the textures. In fact, Blender doesn't
use raytracing for rendering, so you can't have reflections between objects.
To simulate them, I used texture to simulate the glass of the windows,
and the Blender's environment mapping feature for the Porsche 1955 on the
foreground. The windshield also uses a texture to simulate glass reflection.
To make the different textures, I created several cameras with which I
could switch quickly from one to another by selecting them and pressing
Ctrl+NUM0.
To achieve a better realism
with my walls, I used textures with faked shadows on edges corners, so
it could look like radiosity. A tip for a better realism in your texture
: decrease filtering value, you should keep the original aspect of your
file. For the environment mapping, it's easy to use it but I got some troubles
to set the car's painting color and a correct uv mapping. I had to juggle
between specularity, reflectivity and hardness to find a good result.
Lightning was also difficult
to set and it asked a lot of previews before I achieved something nice.
I used 3 kinds of lamps : spot (the only one that can produce shadows),
Sun and basic lamp.
I post-processed this picture
with The Gimp : I added a light blur andan atmospheric effect on
the background, and I also fixed the color of the picture, because it was
too cold at first.
The buildings are inspired
by Antigone in Montpellier (in south of France, where I live), where the
architect Ricardo Bofil designed whole districts in this style. The vehicles
are a futuristic truck and a 1955 Porsche with moderns alloy wheels. At
first, I wanted to model air cushion vehicles but it didn't really matched
what I hoped, so I stayed closer to a classic design.
This picture will change
because I've planned to add a computer warehouse on the right selling GNU/Linux
boxes :-)) but I couldn't right now because I reached my RAM capabilities.
I'll upgrade this picture when I have 128 additional Mb.
I hope you'll find some ideas
in this work. I wish your great fun with Blender which is really a very
good 3D software.
Cheers
Amicalement (in French)
Toussaint
Frédéric |
|


